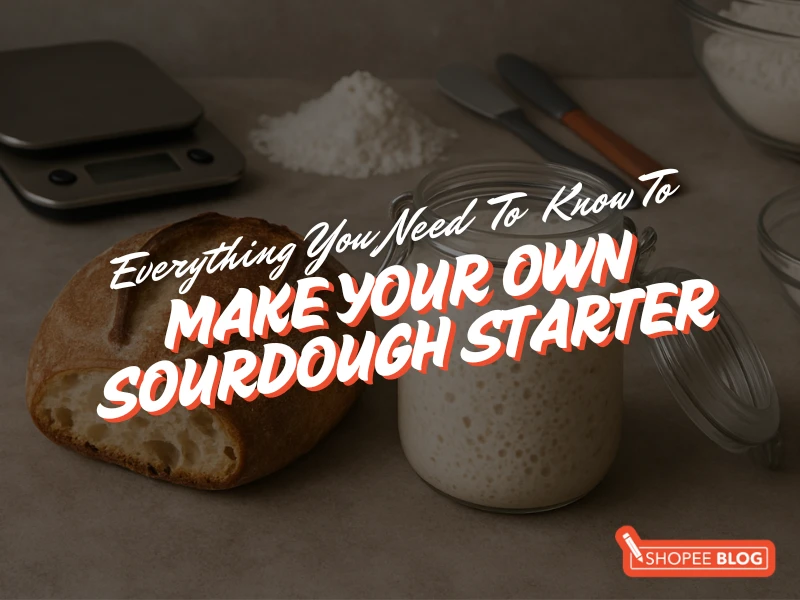
Ever wondered how to make a sourdough starter that produces that iconic fluffy rise, crisp crust, and tangy aroma you get from artisanal bakeries? You just need flour, water, and time! I started baking bread during the lockdown, and after countless trials (and a few failures), I’ve put together a guide on how to develop a strong, reliable sourdough starter in Singapore’s warm and humid climate. No fancy gadgets needed, just a little patience, watching something come to life on your kitchen counter.
What is a sourdough starter?
A sourdough starter is a simple mixture of flour and water that, over several days, becomes naturally fermented. Wild yeast and “good” bacteria feed on the flour, creating a bubbly, living culture that builds sourdough’s airy crumb and distinctive tang.
Most starters take two to three weeks to establish, but in my experience, our warm climate helps build a strong, bake-ready starter in just 10 days. Once established, a starter can last for years with regular feedings, becoming more fragrant and tangy over time.
What’s different about making sourdough starter in Singapore?
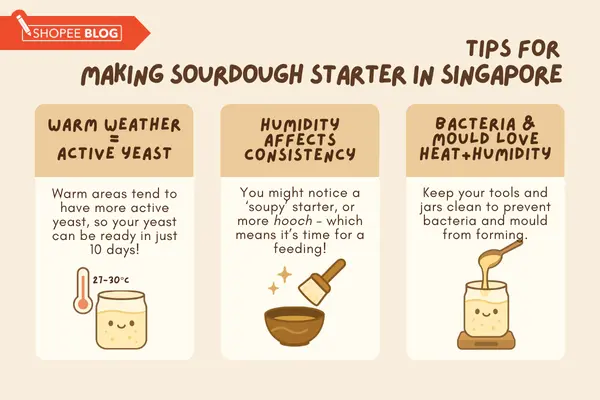
You may be wondering why it matters where you make your sourdough starter. Singapore’s climate speeds up fermentation, which is both a blessing and a challenge. Here’s what you can expect:
1. Warm temperatures make yeast extremely active
Most online guides refer to “room temperature” in cooler countries (around 23 to 25°C). Singapore’s room temperature often sits between 27 and 30°C, which causes both yeast and bacteria to become more active. This means your starter might mature faster than expected.
2. Humidity affects consistency
Even if you measure everything perfectly, your starter may turn runny or “soupy” within a day. You might also notice you don’t develop that dry crust on top that many overseas guides show. Don’t worry, a thin starter often just needs more flour during days four to six.
3. Your starter is more susceptible to bacteria and mould.
It’s normal for your starter to balloon on day two or three before collapsing again (a “false start”). That’s bacteria bubbling, not yeast establishing itself. This is why I always recommend starting with sanitised tools and jars to prevent mould and unwanted bacteria from overpowering the wild yeast.
With that in mind, I created this guide to suit our warmer climate, so your sourdough starter has the best possible chance of thriving!
How to make sourdough starter: Materials you’ll need
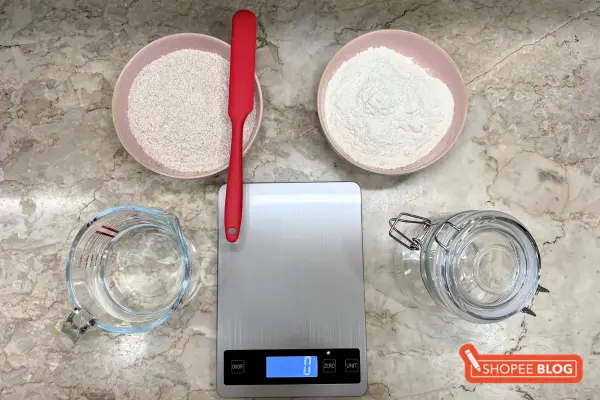
- 1 clean, sanitised 750ml glass jar
- Whole wheat or rye flour (for Day 1)
- Unbleached all-purpose flour or bread flour (for feedings)
- Purified water (avoid distilled; filter tap water if needed)
- Digital kitchen scale
- Silicone spatula or spoon
- Tea towel and rubber band (optional cover)
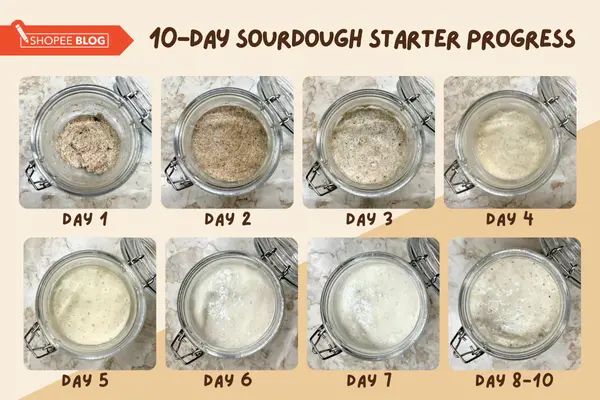
How to make sourdough starter (in 10 days)
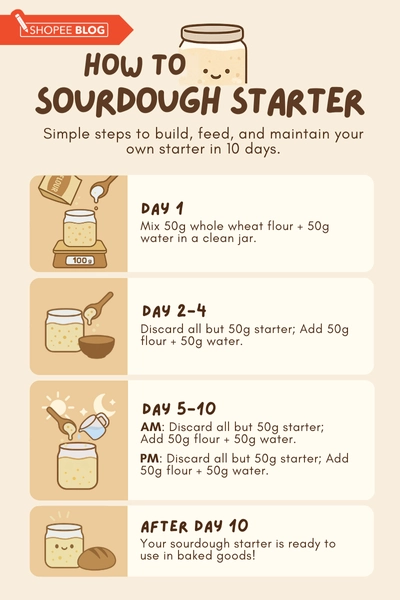
Day 1: Build the base of your sourdough starter
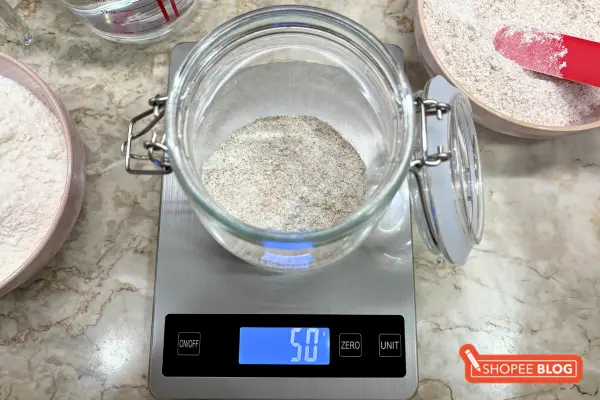
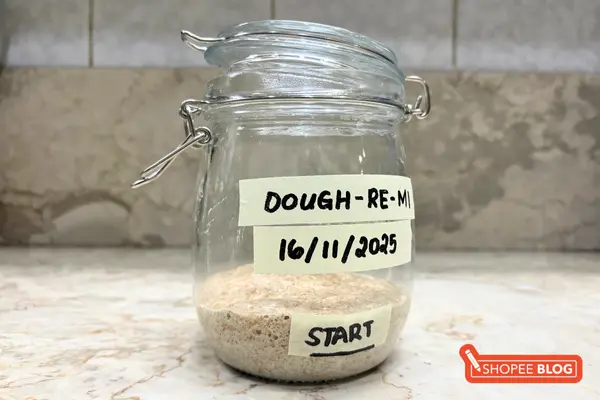
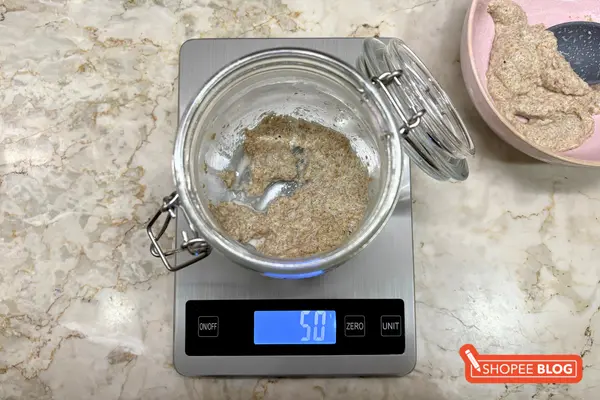
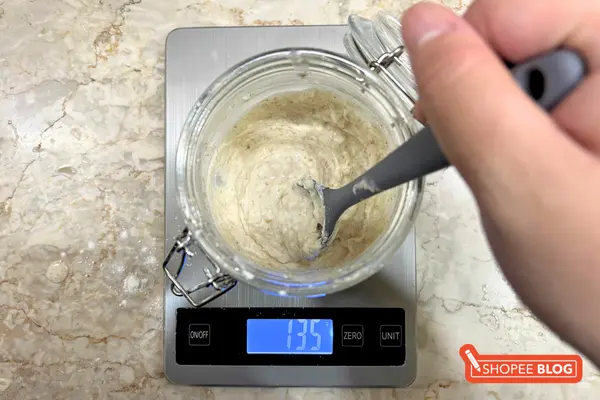
On day one, prepare all your materials. Your jar should be clean and dry, and your tools sanitised to avoid introducing mould spores or unwanted bacteria. Weigh your empty jar without the lid and note this number down; it will help you later. Then, measure 50g of whole wheat or rye flour. These grains provide the nutrients wild yeast loves, giving your starter a stronger foundation.
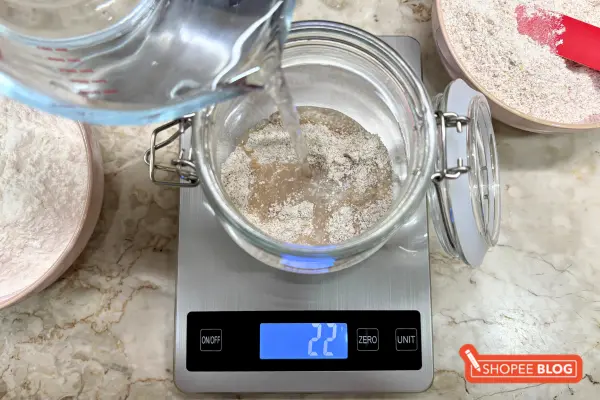
Add in 50g of purified water, (tap water works too, though chlorine may slow fermentation). Stir well, clean the sides of your jar, and mark the level so you can track its growth. Keep the lid loose to allow airflow and prevent pressure buildup. It won’t look like much yet, but this is the moment your starter begins to “come to life.”
Pro tip: Secure a tea towel with a rubber band over your open jar to minimise gas build-up, and let the starter air out as it ferments.
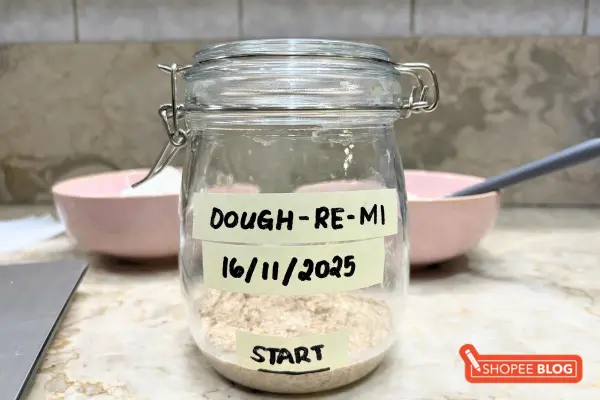
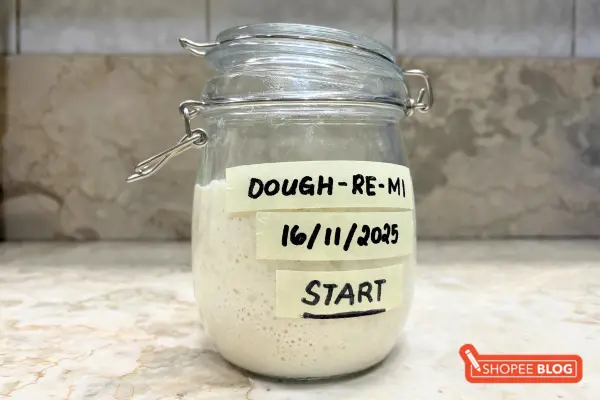
Don’t forget to label your jar with your start date and your starter’s name! Treating your starter like a little kitchen pet makes the process more personal, and it helps you stick to a consistent feeding schedule.
Day 2: The “false start” phase
This is usually the day hopeful bakers get a little too excited (or worried). You may see small bubbles or a light rise, which looks promising but isn’t true yeast activity yet. If yours stays flat, that’s completely normal. Days two and three often show a “false start”, where early bacteria produce gas before the yeast properly establishes itself.
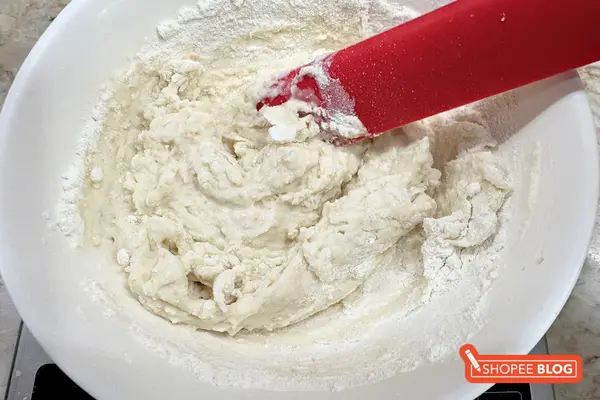
On day two, begin feeding with unbleached plain flour or bread flour in a 1:1:1 ratio. This is also when you’ll start discarding some starter. While it may seem wasteful, it’s easier to feed a small amount of starter than to feed a giant, growing starter!
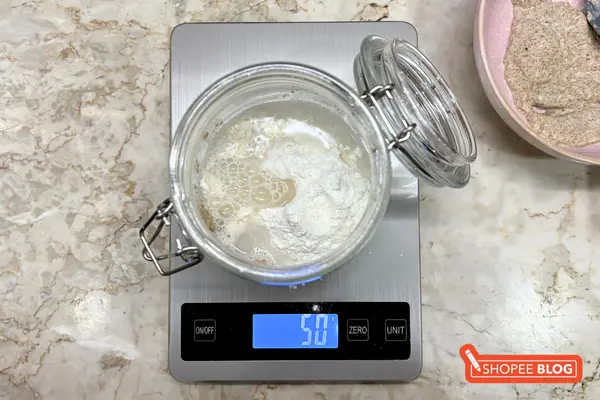
Discard all but 50g of your starter (this is where weighing your jar empty comes in handy). Add another 50g of unbleached flour and 50g of water. Mix thoroughly and adjust your jar mark.
Day 3: Your starter will smell
Continue feeding your starter on day three, whether it shows signs of activity or not. Be prepared once you open the jar – your starter will stink! Not enough “how to make a sourdough starter” guides emphasise this! This is a completely normal part of the process, and it doesn’t mean your starter has gone bad. As long as it doesn’t smell like mould or rotting meat, you should be good to go.
Day 4: The first signs of hooch
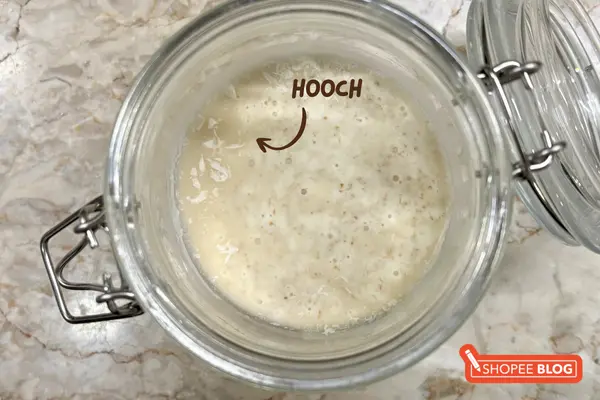
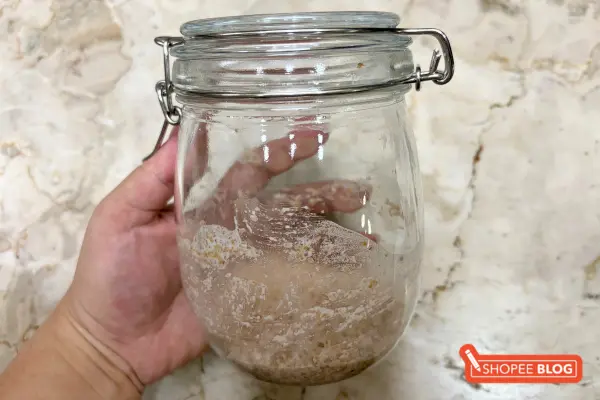
By day four, your starter may become very quiet. Mine usually looks flat with little to no activity compared to previous days. This is completely normal as the yeast is settling and strengthening. You may also see hooch, a layer of grey-brown liquid produced when the starter is hungry.
From day four onward, you can opt to clean out your jar between feedings. This prevents mould from forming and keeps your sourdough starter clean and healthy. To do this, measure out 50g of your sourdough starter into a clean bowl. Discard the rest of your starter, and give your jar a good wash. Let the jar dry completely while you feed your remaining starter with a 1:1:1 ratio. Return your starter to your jar.
Day 5: Increase your feed ratio to 1:3:3
On day five, you’ll need to adjust your feedings according to what your starter needs. If your starter looks thin or runny, it’s a sign that your yeast is burning through food too quickly. Switch to a 1:3:3 ratio. Discard all but 10g of starter, then mix in 30g flour and 30g water. This higher ratio slows fermentation slightly and gives the yeast enough food to grow steadily instead of exhausting itself.
Days 6 to 7: Your starter should have stronger, faster activity
By day six, your starter should rise more quickly, sometimes doubling or even tripling between feedings. The smell becomes more pleasantly tangy, and the texture turns stretchy when lifted.
If your starter rises and collapses before the next feeding, switch to twice-a-day feedings using the 1:3:3 ratio. Alternatively, you can increase to a 1:5:5 ratio for once-a-day feedings (that’s 1 part starter, 5 parts flour, 5 parts water).
Days 8 to 10: Strengthen your starter
By day eight, your starter should look bubbly and lively, with a sweet, yeasty aroma. The yeast and “good” bacteria will have formed a stronger colony by now, giving your starter its signature tang.
Continue feeding for a few more days to stabilise it. Your sourdough starter is ready when it doubles or triples in size between feedings for at least three days straight, has a fluffy texture, and is filled with bubbles throughout.
Storing your starter
Room temperature
Once your starter is strong and active, you can now store it in a cool, dry spot. If you bake two or three times a week, storing your starter at room temperature is perfectly fine. Continue feeding it daily or twice daily, depending on how quickly it rises.
Fridge
If you bake less often, store your starter in the fridge. After it peaks, feed it, let it sit for an hour, then refrigerate it with the lid loosely screwed on. The cold slows yeast activity dramatically, so weekly feedings are enough. I’ve found this rhythm incredibly beginner-proof, and it keeps your sourdough journey feeling enjoyable rather than demanding.
Learn how to make sourdough starter from scratch
Making a sourdough starter can feel intimidating at first, but with just flour, water, and a little patience, you’ll watch your starter transform day by day into a living, reliable culture you can bake with for years (and I’m not kidding, a mature starter can last decades). Plus, plan out your next bake schedule with the best planners in Singapore for 2026, or check out some of the best Chinese variety shows to watch while you wait for your dough to rise!
How to make sourdough starter FAQs
1. Do I really need whole wheat flour or rye flour to make sourdough starter?
Whole wheat or rye flour is often the best choice for beginners since it contains more natural yeast and nutrients that help your starter grow strong and active. Once your starter is stable, you can switch to all-purpose or bread flour for regular feedings. These flours create a smoother texture and a milder flavour, making them ideal for everyday baking.
2. How long before my sourdough starter is ready to use?
A sourdough starter is usually ready for baking after 10 days, once the yeast has fully matured and stabilised. By this stage, it develops that distinct tangy aroma and becomes safe to use, as the healthy yeast culture has overtaken the natural bacteria in the flour. Don’t rush to use it after the first (false) rise.
3. How to tell if sourdough starter is ready to use?
A healthy sourdough starter will look lively, smell pleasantly tangy, and double in size within a few hours of feeding. Here are a few easy ways to check if yours is ready for baking:
- The Float Test: Scoop a small spoonful of starter and drop it into a glass of water. If it floats, it’s airy and full of gas, perfect for baking! If it sinks, give it a few more hours (or another feeding).
- Look for Bubbles: Your starter should be bubbly throughout, not just on the surface. The bubbles show that the yeast is active and thriving.
- The Rise and Fall Pattern: After feeding, mark the level of your starter with a rubber band. When it doubles or even triples in size and then begins to fall slightly, that’s your sweet spot for baking.
- The Smell Test: And lastly, the smell test. A ready starter smells pleasantly yeasty and slightly tangy, like mild yoghurt. If it smells pungent or sour, it might need another feed to rebalance.
4. How to tell if sourdough starter has gone bad?/Why does my sourdough starter smell?
When you’re growing a sourdough starter from scratch, don’t be alarmed if it smells a little funky around days three to five; that’s completely normal! Sometimes it can even smell like old gym socks. This stage happens as natural bacteria release gases before the yeast fully takes over. It’s all part of the process. However, if your starter starts to smell like rotting meat, has visible mould, or develops a pink or orange tint, it’s best to toss it and begin again.
5. What’s the liquid on top of my sourdough starter?
That dark liquid sitting on top of your starter, usually brown or grey, is called hooch. It’s alcohol produced when your yeast has run out of food. Seeing hooch isn’t a bad sign; it just means your starter is hungry and needs feeding. Stir it back in for a stronger tang, or pour it off if you prefer a milder flavour. Either way, a good meal of flour and water will perk it right back up.
7. Why is my sourdough starter not rising?
In Singapore, our warm and humid climate is actually perfect for sourdough. But if your kitchen runs on the cooler side, try placing your starter somewhere a little warmer, like inside the oven with just the light turned on. If temperature isn’t the issue, your starter might simply be too young or in need of a feed. Stick to your regular schedule and give it time. The yeast just needs a bit longer to grow strong and active.


