
Hands up if you have clothes that you’ve only worn once! Before you decide to toss it out, why not add a fresh twist to these pieces by upcycling clothes? Turn an oversized shirt into a smock tube top, or create a cinched waist crop top from an old polo shirt! Not a whiz with the sewing machine? You can still jazz up your outfits with easy no-sew projects! Read on to find the perfect thrift flip project for you
Easy Sewing Projects (Machine):
Using a sewing machine is the fastest and easiest way to upcycling your clothes. You don’t need a sophisticated sewing machine for these easy sewing projects that use simple stitches! Check out the tutorial above for an introduction to the basics of using a sewing machine including how to use parts like the presser foot and bobbin.
1. Midi skirt to matching tube top and mini skirt
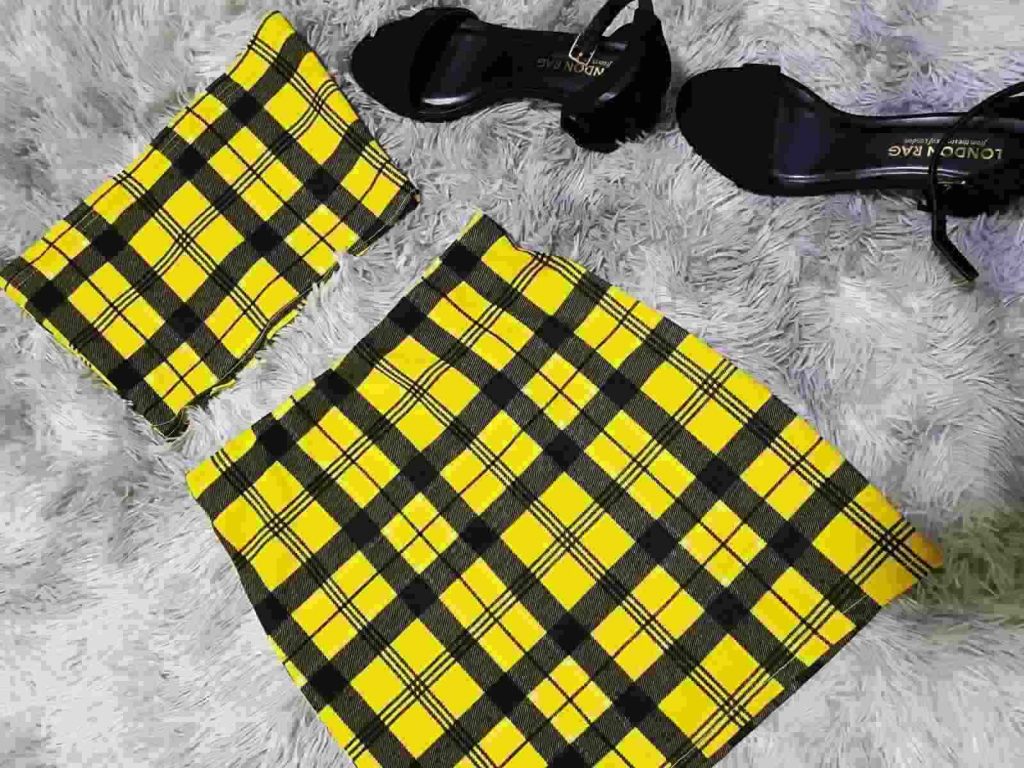
Co-ords or matching outfits are all the rage right now. Upcycle an old midi skirt and save on expenses by upcycling old clothes to make your own set!
Supplies needed:
- Midi skirt
- Fabric chalk
- Sewing pins
- Measuring tape
- Scissors
- Sewing machine
How to:
Make the fabric pieces for the tube top and mini skirt
1. Using a measuring tape, estimate the length of your desired tube top from your chest to your waistline.
2. Then, add a one-inch hem allowance to your measurement and trim off the length from the bottom of the skirt. For example, if your measurement for your chest to waistline is 11 inches, you’d have to cut off 12 inches from the bottom.
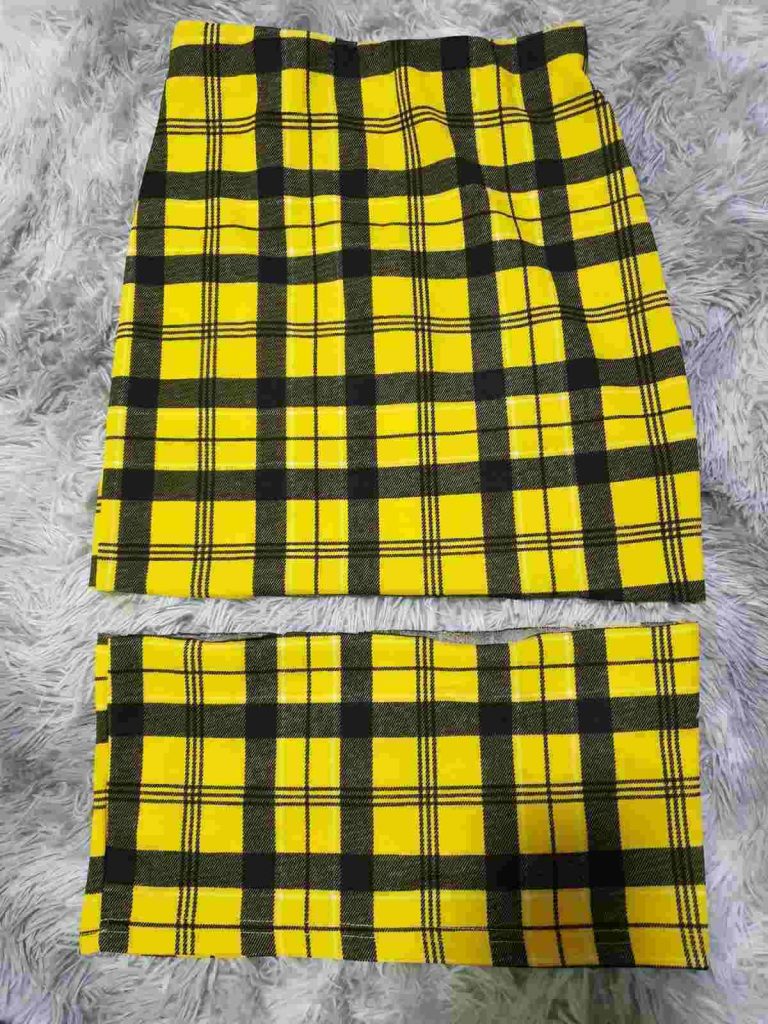
3. At this point, you should have two pieces of fabric – one for the bandeau and one for the mini skirt.
Make the tube top
4. Cut the tube top into two equal rectangular pieces and have them laid on top of each other.
5. After that, take your chest and waist measurements, divide in half and minus off an additional one to two inches, depending on the stretchiness of your fabric. For example, if your measured circumference was 34 inches, you’d have to draw the length of 15-16 inches.
6. Next, draw the length onto the top part of the fabric pieces with fabric chalk.
7. Do the same for the waistline. Draw the length parallel to the chest length at the bottom part of the fabric pieces. Connect the ends of the lines to form a trapezoid shape. This will be the shape of your tube top! Cut out the shape and sew the two pieces together.
Hem the skirt and tube top
8. By cutting the tube top fabric pieces from the bottom of the skirt, we’ve preserved the waistband and shape allowing for us to simply hem the skirt to make an adorable mini skirt! Hemming the skirt can be done with a simple straight stitch. If you’re new to sewing, we recommend using sewing pins to ensure a straight stitch when hemming your skirt. Make sure to also fix the raw hem of your tube top to prevent fraying.
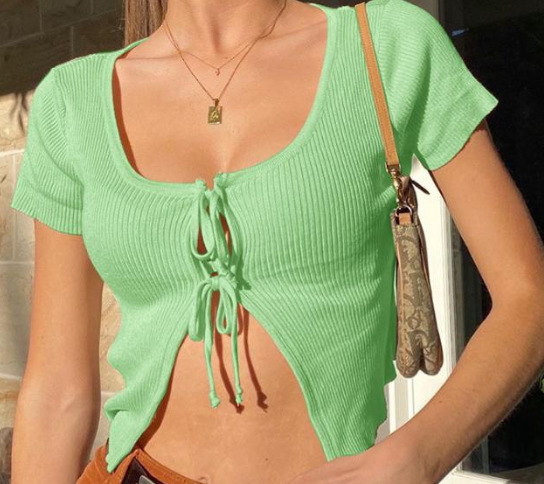
2. Old Polo tee to crop top with cinched waist
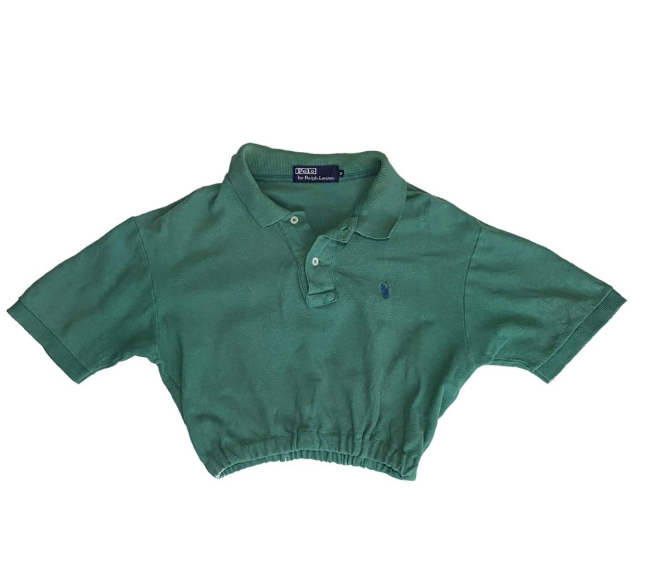
Are you a fan of the vintage look? Nothing screams retro more than a cropped polo shirt. The cinched waist will flatter your figure too!
Supplies needed:
- Polo shirt
- Elastic band
- Fabric Chalk
- Sewing Pins
- Measuring tape
- Scissors
- Sewing machine
- Safety pin
How to:
https://youtu.be/wcEymhupUKM?t=14
Crop the shirt
1. Measure how long you want your crop top to be. You can do so by laying another crop top on top of your polo shirt and add a 1-inch hem allowance. Alternatively, you can use a measuring tape and measure the length of your collar area to your waistline. Make sure to also add the one-inch hem allowance for the elastic waistband.
2. Next, draw a line for where you’ll be cutting off the excess fabric with fabric chalk and snip away!
Add the waistband
3. Partially hem the cropped polo shirt and leave a two-inch gap to insert the elastic waistband later.
4. Then, measure out the elastic band around your waist, make sure to stretch it a bit to attain that cinched waist effect. A good rule of thumb is to shed off a two to three inches from your actual waist measurement.
5. After that, attach a safety pin to one end of the elastic band to help guide the band through the waistline.
6. Next, insert the safety pin with the elastic attached through the two-inch gap. When the front meets the back of the elastic band at the two-inch gap, hand sew the elastic bands together to secure it. Complete the hem of the polo shirt and make sure the elastic bands are well secured inside and voila!
3. Oversized shirt to a smocked tube top

Thrift stores are filled with oversized men’s shirts, making them the perfect hunting grounds for upcycling clothes! This method also works for an array of other fabrics such as old curtains and bedsheets.
Supplies needed:
- Oversized shirt
- Elastic thread
- Fabric Chalk
- Sewing Pins
- Measuring tape
- Scissors
- Sewing machine
How to:
Make the fabric piece for the tube top
1. Take measurements from your chest to waistline, make sure to add a two-inch hem allowance. This will be the length of your tube top. Cut out the fabric piece.
2. After that, double hem both ends of the fabric to prevent fraying
3. Next, mark the parts of the top that you intend to shirr, with the remaining fabric serving as ruffles. In the tutorial, the suggested parts are one centimetre from the top and three centimetres from the bottom.
Shirr the fabric:
4. Hand wind your bobbin with the elastic thread, make sure not to wind it too tightly or loosely. Put your bobbin into the sewing machine afterwards.
5. Then, sew the elastic thread in a straight stitch across the fabric, make sure to make use of the presser foot to ensure a straight and even line. Repeat this step until you’ve achieved multiple rows of shirred fabric.
Sew the ends of the fabric together
6. Lastly, measure the shirred fabric around your abdomen and pin down the excess fabric. Cut off the excess and sew the ends together to complete your shirred tube top!
4. Button-down shirt to skirt
Supplies needed:
- Button-down shirt
- Seam ripper
- Fabric Chalk
- Sewing Pins
- Measuring tape
- Scissors
- Sewing machine
Running low on office wear? Turn your dad’s old button-down shirt into this chic skirt! The best part about upcycling clothes is that you get to customise it. Adjust the length of the skirt however you fancy, from a midi skirt to a mini skirt – the (fashion) world’s your oyster!
How to:
Make the skirt fabric piece
1. Cut off the sleeves along the seams and save them for later.
2. Then, measure the desired length of your skirt. We recommend measuring from your waistline to the mid-thigh area for a mini skirt, to the knees for a knee-length skirt and the calves for a midi skirt.
3. For the front part of the shirt, measure your desired length from the bottom up and draw a horizontal line at the top. Measure the length difference between the front and back parts of the shirt. Then, flip the shirt to the back and measure your desired length with the added length difference, draw a horizontal line at the top too. This step ensures your skirt has an even length.
4. Next, open up the buttons and cut along the horizontal lines drawn. Using a seam ripper, remove the seams at the sides and remove the pocket. You should have three fabric pieces after this step.
5. Lay the front pieces on top of the back. Using sewing pins, pin down the sides that would be sewn into the sides of your skirt. Then, cut off the excess fabric with a one-inch seam allowance. Turn the shirt inside out and sew the sides together.
6. For a gathered effect, turn your stitch length to the highest setting on your sewing machine and sew basting stitches all through the waistline. This allows the fabric to be gathered together. After sewing your basting stitches, gently pull the thread to gather the fabric together.
Make the waistband
7. Using the remaining parts of the button-down shirt, cut out 6 cm of the shirt placket on each side to attain a button and buttonhole set which will be used for the skirt. Use the seam ripper to remove all stitches from each side, to allow you to sew the ends of the pieces from the inside out.
8. Next, flip the fabric pieces inside out and sew one end to prevent fraying, do so for both the button piece and button hold piece. Afterwards, sew back new stitches for the sides of the fabric pieces.
9. Using the sleeve we had initially cut off in Step 1, cut the inseam and the cuff. Fold the sleeve fabric piece in half. Measure your waist and divide it in half and add 1-2 inches for seam allowance.
10. Using this length, measure out the length needed from the sleeve and cut accordingly. After cutting, open up the sleeve fabric piece and cut it in equal halves. Cut one of the subsequent pieces in half again, these fabric pieces will make up the waistband for the front part of the button-down skirt.
11. Then, iron on fabric interfacing for all fabric pieces to add structure to the waistband.
12. Lay plackets (right side down) from Step 6 onto the front waistband. Fold the front waistband in half, sew the ends and flip them back to the right side facing out.
13. Button the front waistband pieces together and trim off the back waistband to match the length of the buttoned front waistband. Afterwards, sew the side seams for a unified waistband.
Sew the waistband to the skirt fabric piece
14. Lastly, sew the waistband onto the skirt and voila! You’ve got yourself a button-down skirt.
Hand Sewing Projects:
While tedious, hand sewing does have it’s redeeming factors! It’s a low-cost way for upcycling clothes while still allowing for control over your sewing. Aside from equipping yourself with a standard sewing kit, make sure to learn some basic stitching techniques to make strong and durable pieces!
5. Basic long sleeve shirt to front tie cardigan

Add a feminine touch to your long sleeve shirt and turn it into a flirty front tie cardigan! A thin cardigan allows you to stay breezy and cute, especially in Singapore’s unpredictable weather.
Supplies needed:
- Long sleeve shirt
- Fabric Chalk
- Sewing Pins
- Ruler
- Scissors
- Thread
- Needle
How to:
Crop the long sleeve shirt
1. Crop the top by drawing a horizontal line with your fabric chalk across where you want the top to end. Pin down the line and trim off the excess fabric with your scissors.
Make the V-neckline
2. Measure down four inches from the neckline to make the V-neckline. Draw a triangle shape up to the edges of the collar area. Draw a straight line down from the tip of the triangle to mark the opening of the cardigan. Then, cut along the lines, make sure to remove the collar along with the rest of the unwanted fabric.
Make the ribbon pieces
3. Using the trimmed fabric from Step 1, cut the fabric into two 1.5-inch width strips. These fabric strips will be used as the ribbon for the front of the cardigan. Fold the edges of the fabric together and secure with sewing pins. Straight stitch the fabric together with a hand sewing needle and thread.
Sew the ribbon pieces onto the neckline
4. Finally, sew the two ribbons onto each side of the neckline and tie them together to get your front tie cardigan!
6. Turn any top into a crop top

Crop tops are one of the easiest apparels to achieve when upcycling clothes as all you need is a pair of scissors and a good hemming technique!
Supplies needed:
- Any top
- Fabric Chalk
- Sewing Pins
- Ruler
- Scissors
- Thread
- Needle
How to:
https://youtu.be/U1riAAPyzEc?t=13
Crop the shirt
1. Measure the length for where you want your crop top to end and add a one inch hem allowance
2. Draw a horizontal line with the fabric chalk to mark where to cut off the excess fabric. Make sure to draw with a ruler to ensure a straight line. Using a pair of scissors, snip off the bottom piece of the top.
Hem the shirt
3. Next, fold up the edges and pin them down with sewing pins to form your hem.
4. With a needle and thread, sew the hem of your top to complete your crop top. Check out the above video for a detailed guide to hemming and you’ll be upcycling clothes with ease in no time!
No-Sew Projects
If you’re afraid of needles or just looking for a really quick and easy thrift flip project, we have some options for you! There are many alternative ways to upcycling your clothes. A popular method is with the use of fabric glue in place of regular sewing.
7. Regular cardigan to front tie crop cardigan
Change up an old cardigan with this easy no-sew project. The star supply for upcycling clothes without sewing is fabric glue! Fabric glue also helps to prevent fraying without the need to hem the edges of your fabric.
Supplies needed:
- Cardigan
- Scissors
- Seam ripper
- Fabric glue
How to:
Crop the cardigan
1. Crop your old cardigan to your desired length with a pair of scissors. Remove the buttons from the cardigan with a seam ripper.
Make the ribbon pieces
2. Snip the excess fabric into thin strips to make the ribbon for the cardigan. Spread fabric glue onto the thin strips and fold them in half, glueing them together. After the ribbon pieces have dried, trim them evenly and cut them into four equal pieces.
3. Then, add a drop of glue where the buttons were on the cardigan and attach the ribbon pieces in their place. Place a thick book on top of the cardigan as it dries.
Hem the cardigan
4. Lastly, tie the ribbon pieces into a bow to complete the front tie cardigan! For the extra security, you can hem the edges of your front tie cardigan with fabric glue to prevent fraying. This is especially crucial for fabrics like polyester that may fray easily.
8. Regular denim jeans to distressed denim shorts
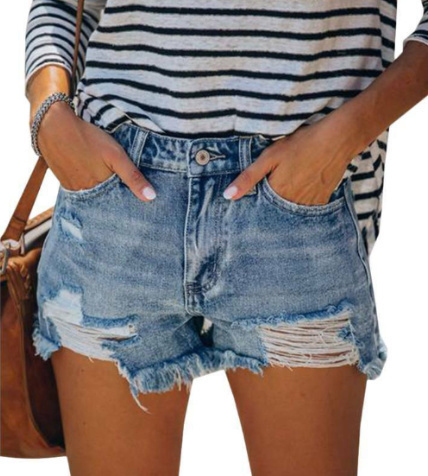
Give your pair of denim jeans a new look by adding some grunge and ruggedness to them. You can also achieve an acid wash effect with the help of this no-sew project!
Supplies needed:
- Denim shorts/jeans
- Scissors
- Bleach
- Fabric chalk
- Spray bottle
- Washing machine
- Dryer
- Tweezers
How to:
Trim the ends of your denim jeans
1. Place an existing pair of shorts on top of your denim jeans and trim according to your desired length. Add an extra 1.5 inches in length for fraying and slits.
Cut slits and holes into the denim
2. With fabric chalk, mark where you want your denim slits and holes. Cut the slits with a pair of scissors. Do the same for the back.
Lighten the fabric with bleach
3. Next, pour some bleach into a spray bottle and spritz the bleach onto the denim shorts. Be sure to do it from at least 10 inches away. This step helps to lighten the shorts and give it a faded effect.
4. After a few minutes, check back. Once the shorts have reached your desired shade, put it into the washing machine and dryer. The rough and tumble of the dryer should bring out some fraying and loose threads.
Distress the denim with tweezers
5. Finally, pull out the blue threads at the edge of the slits with a pair of tweezers. This will expose the white threads which add to the distressed effect. Continue to pull out the blue threads until you are satisfied with the appearance of your distressed denim shorts.
Upcycle clothes effortlessly with our list of easy sewing projects!
Back to school season is just around the corner so why not hop onto the thrift flip trend by upcycling clothes this semester? Not only does it save money but you’ll also feel a sense of accomplishment knowing you’ve made your own clothes. In the mood for more DIYs? Check out our guide on making a DIY bubblegum sugar lip scrub or a DIY face mask and bring out your creative side!


