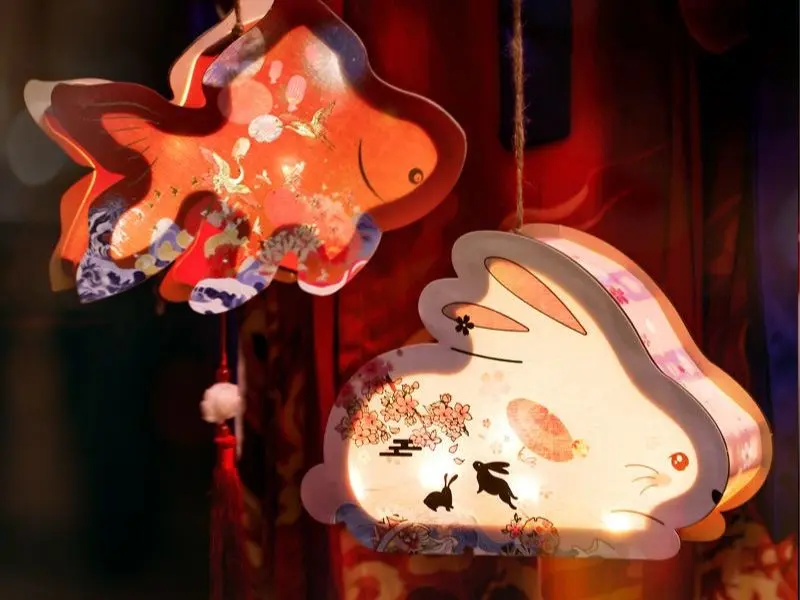
How did you celebrate the Mid-Autumn festival as a kid? For us, parading our fanciful craft lanterns around the neighbourhood was the most exciting part of the Mid-Autumn festival (aside from the delicious mooncakes, of course)! This year, bring the tradition alive by guiding your kids to make their own lanterns. With easy-to-follow steps, it’s guaranteed to make your little one walk around the ‘hood with pride!
Quick overview: DIY lantern making ideas for kids
| Lantern Type | Materials Needed | Difficulty | Suitable Age | Why we love it |
| Paper Plate Jade Rabbit Lantern |
|
⭐⭐ | 6 – 10 yrs |
|
| Foolscap Paper Chinese Lantern |
|
⭐ | 5 – 8 yrs |
|
| Cereal Box Lantern |
|
⭐⭐ | 6 – 12 yrs |
|
| Glowing Plastic Cup Lantern |
|
⭐ | 5 – 8 yrs |
|
| Paper Plate Ball Lantern |
|
⭐⭐ | 7 – 12 yrs |
|
| Animal Lantern Kit |
|
⭐ | 4 – 7 yrs |
|
| Traditional Pomelo Lantern |
|
⭐⭐⭐ | 8 – 12 yrs |
|
| Ice Cream Stick Lantern |
|
⭐⭐ | 6 – 10 yrs |
|
| Tracing Paper Lantern |
|
⭐ | 5 – 12 yrs |
|
1. DIY paper plate Jade Rabbit lantern
Take the chance this Mid-Autumn Festival to share the story about the selfless sacrifice of the Jade Rabbit with your little ones. Then, guide them to make a DIY Jade Rabbit Mid-Autumn paper lantern with this simple lantern making idea!
You will need:
- 6 paper plates
- 4 paper lace doilies
- Coloured construction paper
- 2 pieces of 40cm string
- Wooden stick
- Scotch tape
- Blu tack
- Glue
- Stapler
- Scissors
- Craft knife
- Electric tealight
How to make this DIY lantern:
- Using scissors, cut out the centre portion of the paper plate. Repeat this on five other paper plates.
- Glue paper doilies onto the paper plate frames, covering each circle opening.
- Staple the four paper plates together on their sides.
- The remaining paper plate frame will form the roof of your lantern. Fold it into half from right to left, then again from top to bottom. Unfold everything and you’ll see four crease lines. Make a small opening on each crease with a craft knife.
- Staple the roof of the lantern onto the four walls created in step 3.
- To form the base, staple an uncut paper plate onto the bottom of the four walls.
- Create Jade Rabbit faces by cutting out eyes, nose and mouth from coloured construction papers, and glue them on the lantern.
- To make the handle, pull the ends of each string into the four openings created on the roof of the lantern. Make sure the strings intersect each other. Then, tie a knot on each end.
- Loop the strings around a wooden lantern stick and secure with tape
- Use blu tack to secure an electric tealight onto the inner side of the base.
2. Foolscap paper Chinese lantern
If there’s one thing young kids have in abundance, it’s foolscap paper! This simple DIY lantern making idea for kids is a great way to turn used foolscap paper into beautiful art pieces!
You will need:
- A4 foolscap paper
- A4 cardstock
- 14cm String
- Watercolour paints
- Paintbrushes
- Coloured markers
- Glue
- Scissors
- Hole puncher
- (Optional) Tassel
How to make this DIY lantern idea:
- Get your kids to paint the entire foolscap paper with watercolour.
- Once the paint has dried, the little ones can doodle using the Faber-Castell Markers!
- Create pleat folds of 1.6cm wide along the length of the foolscap paper
- Without unfolding the paper, create more pleat folds down the folded strip
- Unfold the entire piece of paper to reveal your beautiful pleated lantern design!
- Glue the widths of the paper together with a glue stick.
- Using the same pleat fold technique, gently fold the paper along the horizontal pleated lines until you get a folded paper ring.
- Using scissors, cut two circles with a 7cm diameter from the cardstock.
- Cut out a circle of 4cm diameter in the middle of one of the circle cardstock you’ve created in step 8. This will form the roof of the lantern.
- Glue on the roof of your lantern to the top end of your folded paper ring. Secure the other piece of circle you cut out in step 8 to the bottom end of your folded paper ring with glue.
- With a single hole puncher, punch two holes opposite each other on the roof of your lantern. Loop a string of about 14cm into the holes and secure them by tying a knot on each end.
3. Cereal box DIY lantern
Cereal is a yummy and nutrient-rich breakfast choice to help kickstart your child’s day. Instead of throwing out empty cereal boxes, we suggest using them for this DIY lantern making idea with your little ones this Mid-Autumn 2023!
You will need:
- 1 cereal box
- Coloured papers
- Double-sided tape
- Scotch tape
- Coloured markers
- Hole puncher
- 3 pieces of 15cm wire
- Fairylights
- Wooden stick
- Scissors
- Ruler
- Penknife
- Pencil
How to make this DIY lantern:
- Using a pencil and ruler, draw a rectangle 20cm long and 10cm wide on the two wider faces of an empty cereal box. Repeat this on the two narrower faces of the box but reduce the rectangle width to 5cm.
- Cut out the four rectangles drawn with a penknife.
- Cut off the flaps from the top of the box
- Measure the length and width of each side of the box. Cut four pieces of colour paper according to the measurements.
- Give your child the coloured paper and get them to draw four separate illustrations with Sharpie Permanent Markers.
- Attach the drawings to each side of the box using double-sided tape, ensuring that the paper covers the entire window on the box
- Make a hole on the two narrow sides of the box nearer to the top edge.
- String a piece of wire into each hole. Twist the two ends of each wire together and create a loop. Using a third wire, bend it in half and twist the two ends together. String the third wire through the two wire loops on the box and twist to secure everything in place.
- Place a battery-operated fairy light into the lantern.
- To complete the lantern, tape a wooden stick to the wire handle and turn on the fairy lights!
4. Glowing plastic cup DIY lantern
Are you and your kid bubble tea fanatics? Treat yourselves to your favourite bubble tea but don’t throw the plastic cup away! With a quick wash, it can be turned into a glowing DIY Mid-Autumn Festival lantern!
You will need:
- Tracing paper
- Plain paper
- Waxed cotton cords
- Plastic cup and lid
- Coloured brush pens
- Electric tealight
- Scissors
- Ruler
- Pencil
How to make this DIY lantern idea:
- Measure the circumference of the plastic cup’s top, base and height.
- On a plain paper, draw and cut out a strip of paper according to these measurements. It should roll up to form a cone shape that fits into the cup.
- Next, draw horizontal lines across the paper you’ve cut out in step 2. The lines should be about 5cm apart from each other. This forms a paper guide for step 4.
- Lay a piece of tracing paper over the paper guide and cut it into the same shape. Trace the lines seen on the paper guide onto the tracing paper. Hand this tracing paper to your kids and they can start to decorate each row using coloured brush pens!
- Let your kids choose three of their favourite waxed cotton cord colours. Cut the cords to about 20cm long and tie a knot on one end. Then, braid them together and tie a knot on the other end.
- Once the tracing paper is decorated, roll it into a cone and place it into the plastic up.
- Turn on the electric tealight and drop it into the plastic cup.
- Fold your braided cord into half and slot it through the middle of the cup lid from inside out.
- Place the lid on the cup and voila, your unique glowing plastic cup DIY lantern is done!
5. Paper plate ball lantern
Don’t have much time left to learn how to make an elaborate paper lantern with your kids? Fret not, we’ve got the perfect last-minute DIY lantern making idea for your little ones — the paper plate ball lantern!
You will need:
- Scissors
- Paper plates
- Kitchen roll cardboard tube
- Spray paints
- Poster colours
- Hot glue gun
- Wooden cloth peg
- Wooden stick
How to make this DIY lantern idea:
- Fold a paper plate into half. Cut the paper plate along the crease line.
- Position the straight edge of the paper plate against the cardboard tube. Mark the point where the paper plate ends on the cardboard tube and trim any excess.
- Paint the trimmed cardboard tube with poster colours.
- Use a glue gun along the straight edge of the paper plate created in step one.
- Connect the paper plate to the cardboard tube at an almost 90-degree angle.
- Repeat steps four to five with the other half of the paper plate on the opposite side of the cardboard tube.
- Cut more paper plates into half and repeat steps four to five, ensuring all the paper plates are facing the same direction. Stop when you’ve attached 10 paper plates.
- Lay the lantern on newspaper and decorate it with spray paint.
- Press down on a wooden cloth peg to keep it open, twirl a small section of a 35cm raffia string into the mouth of the cloth peg.
- Drop the string and cloth peg through the cardboard tube and out from the other end. Position the cloth peg horizontally so it’s unable to pass through the cardboard tube.
- Tie the loose ends of the string together and tape on a wooden stick for the handle.
6. Animal DIY lantern
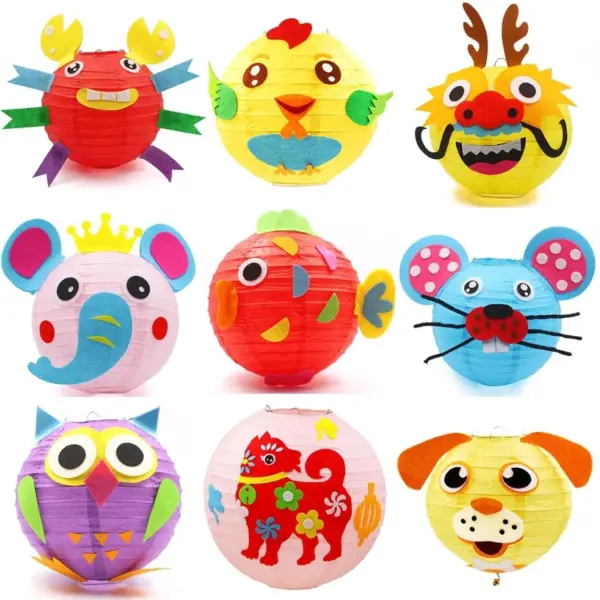
Gathering all the necessary materials for your kid’s DIY lantern making idea can be troublesome. Save yourself the hassle with this Animal DIY lantern kit which comes with everything you need for a quick artsy session with your little ones! The pieces come with adhesive so no glue is needed for this DIY.
You will need:
- Animal DIY lantern kit
How to make this DIY lantern idea:
- Stick the various pieces onto the lantern to form the animal design according to the instructions included in the kit
- Attach the lantern stick and LED light (included in kit)
7. DIY Traditional pomelo lantern
What’s a Mid-Autumn feast without pomelos? The Mandarin term for pomelo is ‘you’, which sounds like ‘blessings’. Hence, pomelos are often offered to the moon during this occasion in hopes that the Moon Goddess will bless the family with good luck and happiness! While not everyone can appreciate the bittersweet citrusy taste of pomelos, kids can appreciate the traditions by creating their own pomelo lantern with this easy DIY lantern idea!
You will need:
- Pomelo rind
- Twine string
- Safety pin
- Pen
- Lantern stick
- Tealight candle
- Lighter
- Knife
- Rubber band
- Chopstick
How to make this DIY lantern:
- Get your kids to draw some shapes on the pomelo rind
- Parents will have to help your kids for this step. Carve out according to the shapes drawn in step 1 using a carving knife.
- Cut the cap of the pomelo off to prevent the candle from burning it
- Using a chopstick, poke eight holes into the top of the pomelo. You should have two holes per rind. These holes will be used to thread the string.
- Loop the twine string into the safety pin and thread it through all the holes created in step 4
- Repeat step 5 again from the inside. Then, weave the excess string through the strings threaded on the outside of the pomelo. Stop when the two ends of your string are opposite each other.
- Cut the strings and tie them together. Wrap the string around the lantern stick and secure with a rubber band.
- Put the tealight candle into the lantern and light it up for the celebration!
8. Ice cream sticks DIY lantern
Have lots of ice cream sticks lying around in your house after your child’s school art and craft project? Put them to good use this Mid Autumn Festival 2023 by building a rainbow ice cream stick lantern with this DIY lantern making idea for little ones in kindergarten!
You will need:
- 72 coloured serrated ice cream sticks
- Glue
- Coloured markers
- White papers
- Coloured papers
- Ribbons
- Scissors
- Plastic lantern stick
How to make this DIY lantern:
- Form a square using four serrated ice cream sticks, making sure the joints are locked securely into one another. Repeat this until you have 18 squares in any colour combination you prefer. Connect the squares together through the serrated joints.
- Let the kids draw their favourite cartoon characters on white or coloured papers. Give them some coloured markers to add colour to their drawings.
- Cut out their drawings and glue them to the ice cream stick lantern
- Using a long piece of ribbon, loop across the entire lantern and tie into a secured knot at the side
- Cut five pieces of ribbons of the same length (about 10 to 15cm). Glue the tip of each piece to one another to create a tassel.
- Glue the tassel to another piece of ribbon. Conceal the connection by wrapping a short piece of ribbon around the tip of the tassel. Tie the tassel to the base of the lantern.
- Hook a plastic lantern stick over the ribbon at the top of the lantern to complete this pretty piece!
9. Tracing paper lantern
If your kiddo loves doodling, this tracing paper DIY lantern making idea would be a great canvas for his or her creations! Whether your little one is still in kindergarten or in primary school, this DIY lantern making idea is suitable for kids of all ages!
You will need:
- Battery-powered candle tealights
- Double-sided tape
- Yarn/string
- Coloured paper
- Tracing paper
- Hole-puncher
- Scissors
- Ruler
- Colouring pencils/markers
How to make this DIY lantern:
- Measure the perimeter of the candle tealight using a piece of paper
- Mark the perimeter with a pencil on the paper and create a rectangle with the length (e.g. 12cm) you have measured
- Trace the rectangle on a piece of tracing paper and cut it out
- Make two coloured paper strips that are of the same length as the perimeter of the candle tealight
- Place the candle tealight horizontally on the top of the paper strip and make a mark at the end of the candle tealight
- Cut the paper strip along this mark
- Fold the thicker strip in half to make the lantern’s upper rim
- Glue the thinner strip on one end of the tracing paper that you cut out
- On the other end, glue half of the thicker strip on the other end of the tracing paper and fold the other half down
- Draw any design you’d like on the tracing paper using a pencil and coloured pencils – like your favourite patterns or animal!
- Paste double sided tape on the sides of the electric tealight
- Wrap it around the tracing paper lantern shell and glue them along the middle
- Punch two holes on the rim of the tracing paper lantern
- String a yarn across both holes and tie a knot to secure it and you’re all ready to carry your creation out!
Frequently asked questions (FAQs) about Mid-Autumn Festival and lantern making
1. What are the traditional Mid-Autumn lanterns?
Traditional Mid-Autumn lanterns were originally made from paper, bamboo, and candles. They often took the shape of animals, lotuses, fish, or the Jade Rabbit to symbolise good fortune and reunion. Today, modern versions include LED lanterns and cartoon-themed designs, but handmade paper lanterns are still a cultural highlight during lantern walks.
2. What materials are safe for kids’ DIY lanterns?
The safest materials for children’s lantern crafts are lightweight and non-flammable items such as:
- Paper plates, foolscap paper, or tracing paper
- Cardboard or cereal boxes
- Wooden ice cream sticks
- LED tealights or fairy lights (instead of candles)
Avoid real candles, thin plastics, or easily flammable paints, especially for preschool crafts.
3. Why do we carry lanterns during Mid-Autumn Festival?
Lanterns symbolise light, hope, and family reunion. Carrying lanterns under the full moon is a tradition that dates back centuries, representing brightness guiding families towards harmony. For children, the lantern walk is a fun way to participate in the festival while connecting with Chinese cultural heritage.
Get ready for moon viewing in 2025 with these DIY lantern making ideas
Now that you’ve learnt how to make lanterns with your kids, parade your fancy crafts while tucking into some yummy mooncakes! Treat the family to some of the best durian snowskin mooncakes in Singapore or traditional mooncakes which are sure to delight all ages! You can also check out some of these popular snowskin mooncakes that’ll make great gifts for friends or colleagues.


![best diaper bag singapore [featured]](https://shopee.sg/blog/wp-content/uploads/2023/06/best-diaper-bag-singapore-featured-1.webp)


